Pages

Thursday, September 2, 2010

Took a break....

I've taken a break on the posts, because I got the itch to reorganize a few things (again). Doesn't it always seem that there is always a better way? Any way, plan to get the updated changes photographed over the weekend and resume the tour next week.

Friday, July 9, 2010

Scrapbook Studio - IKEA Shelves (2) - Ribbons, and Buttons, and Flowers, Oh My! Part 5

Hello again! Today we are going to visit my newest IKEA Expedit Shelf.  Earlier this year I re-did my space and replaced some very cute but not functional shelves.  


This time we will go bottom's up. 

I pared down my magazine and idea book collection to the 6 pink holders below and one shelf on the long wall (seen in yesterday's post).  I subscribe to several scrapbook magazines and love idea books. But the past issues (from 2002 forward) were taking up several shelves in my closet.  I rarely look at them, so I decided to only keep the past year's worth of issues and idea books I was still inspired by. The old magazines will be bagged up by year for the next LSS yard sale.  The magazine holders were from Organize.com, I believe.

The wicker baskets (from IKEA) will be covered  in a future post as they hold Cricut and sewing supplies.

The shelves 3rd from the bottom hold my recently in supplies.  This is the box where I put my purchases (that are not from kits).  This helps me use the new fun things that I discovered in the LSS that excited me enough to buy it.  When working on a page that needs something, this is my first go to stash.  This is new for me, but as I get less inspired bu something, they rotate to the location that they would normally be located.


Earlier this year I got this idea for storing ribbon from Gina Johnson.  As you will see in the next picture I should have ribbon covered, but it is an area I still need to spend some time thinning down, but I still can't help myself from buying new pieces of it.  Now pieces that are about a yard or less are wrapped around a clothespin and thrown in this basket.  I can rifle through here and find what I like and it is so colorful, it just makes me happy.


Both baskets were picked up at Michael's from the spring baskets bought on sale.


I admit I had those Prima milk bottles in every style and color, but I recently got rid of most of them in the LSS yard sale.  I only kept ones I deemed usable for me, as well as other pretty jars and bottles I knew I would be likely to use.  

Currently the shelf next to this one is empty with my former crop sale table display jars. I haven't figured out what I want to do with those.

 Lastly, this is my ribbon and button display.  I have stored my ribbon by color in the large canning jars for years.  It works nicely for finding ribbon for a certain color, but it is a pain to pull it in and out.  On my to do list is to thin those out.

I have always stored my buttons in big jars (back right) all mixed up.  But after closing Color Me Daisy I was still left with a huge button supply we had purchased to match to kits.  I also had several jars we used for the embellishment bar we set up at our crop nights.  

So I took the empty jars and filled them with different colored buttons, and already I like being able to pick out just the colors I want for a page.  But I have no desire to sort the mixed jars, and I think they serve a purpose too.  

And all the bright colors on that shelf make me happy!

See you tomorrow to talk about wall space!

Thursday, July 8, 2010

Scrapbook Studio - IKEA Shelves (1) - Counterspace and all those cubes!

Welcome to Part 4 of my scrapbook space tour.  We are now getting into the details.  I hope you are getting some ideas on organizing your space, and I would love to hear yours too!  I certainly don't think I am an expert as this is an evolving process.  As my tastes and style changes so does how I organize my space to make the most of my limited creative time.  After all, I don't want to spend my scrap time organizing stuff.

In 2008, I made 2 big changes.  I wanted my work space in the center of the room and I decided I wanted more counter space so I could keep my tools out and ready to use (like the Cricut, Cuttlebug, sewing machine, etc.  I couldn't afford  to do anything extravagant, so I started pondering my options.  


I couldn't justify replacing the furniture I had just bought 2 years ago, but fortunately that was versatile enough to move around.  I measured out my long wall and figured out I had about 15 feet along that wall.  So I moved the desks to the center of the room and added 3 IKEA Expedit 2x4 shelves.  The height was good for setting up tools on the top and storing lots of stuff both in the open and in baskets that IKEA sells that fit the cubes perfectly.

To the Left

Cubes -  I use that space to store a tote for taking to crops and a basket to hold my past banners I have hung in my family room.  I have yet to re-use any of them, I usually just make more, but I haven't been able to let 
go.  Next are my Cricut cubes, which I will share more of how I store those supplies in a later post. Next are some scrapbook Idea Books.


I use the 2 baskets in this section to store miscellaneous fabric and sewing tools and supplies, I am just learning to sew, so I have not "collected" a lot of things yet.

Counter - In this section is my "bargain basement Target" sewing machine that I mentioned previously and my thread holder, as well as some room decor and pretty smelling candles.

Center

Cubes - Some mini albums, my Cricut Jukebox, projects in progress, label maker, Cuttlebug dies, and paper trimmer and chipboard, are stored in the cubes in the middle of the room.


Apparently I haven't met much chipboard that I did not like, so I have one for shapes and one for alphas (and this is the pared down version after my huge purge I did in January).

Countertop - I keep my Cuttlebug, Xyron (5"), Sizzix Texturizer, and Bind it All on the counter. It makes it easy to use any of them, the Cuttlebug dies and embossing folders are stored in a one of the pink boxes and my bind-it-all supplies are in the other. (seen pictured below).


The picture above was taken in January, I had given my TV to my son and finally bought another one this year and added a DVR, which I can now watch Glee, Tori and Dean, and all kinds of other silly shows that my husband could care less about.


In the corner I keep my Epson wide format printer (I have the R1800, but the R1900 is the current model).  I love the printer, it does print great photos) but I don't do enough that would really require a wide format printer.  So when I replace it I will just buy a good standard photo printer.  If I need a 12x12 page printed I'll pay the $3 to have Costco print it.

Also on the counter is my pencil sharpener and heat gun.

I use one cube here for my oldest sons craft stuff.  He comes to visit me in my room sometimes, so I keep crayons, and a ton of punched shapes and supplies in a basekt for him.

I also have my Scor Pal in here as well as business remnants (fax machine, Bazzill & American Crafts cardstock swatch books.

The baskets hold my Library of Memories Album supplies (later post), card supplies such as envelopes, and card specific embellishments, and I have 2 baskets of alterable items.  These are either specific things like frames, ornaments, decoration that I have purchased, or things I felt should be recycled for gift packaging or some other use.  


Tomorrow I will cover the other IKEA shelf and over the weekend we start to tackle "THE CLOSET".  Hope you are enjoying your tour!

Tuesday, July 6, 2010

Scrapbook Studio - The Desk - Part 3

Welcome to Part 3 - The Desk and What is at My Fingertips (my most used tools).  Today I will be sharing the details of how my desk is organized.


After each major work session, I like to put my desk back in order to look like this.  If I don't I have trouble starting something new.  There are plenty of times it is in disarray when I am mid-project. But when I finish up everything goes back to it's place and I start on my next round of destruction.


This is the busiest part of the room.  The work table...the hub...where all things come in and wait for a home.  I have my older desk top computer on the left side of the desk, I keep my Cricut Expression turned to the side so I have room to paint, mist or let things dry.  When I need to use the Cricut, I can just turn it a bit so the mat can run through the back.


At my main work station I have a large self healing mat.  It was made by Making Memories and has 1" marks across, so it works great for lining up elements on a layout.  I keep a large space open to my side for the current scrapbook kit (the one on my desk here is from Studio Calico).  


I have recently set up my sewing machine at one end of my work table.   It is plugged in and threaded for a quick stitch on a layout.  This table also is the hub for all new items.  Things are usually placed here until I sort them to put away.  


I like to leave a new magazine or idea book out for a quick inspiration, when I am working.  I recently picked up Elizabeth Kartchner's book 52 More Scrapbooking Challenges with a coupon from CK Club Scrap. It is a fun book to flip through for inspiration.


I found that I was always needing liquid adhesive. So I keep my 3 favorites in this desk holder from an office supply store.  I am constantly using Fabritac for fabric and some ribbons on my layouts.  I like Tacky Glue for all kinds of all purpose things, and Beacon's 3 in 1 Craft Glue is like scrapbooking super glue.  If you want it attached to your chipboard and don't want to mess with something like Modge Podge, this glue is for you.  I keep pins in the top so they don't clog and they are always within reach.


I also started using that little bucket (from the Target dollar spot) to throw all kinds of left over bits and baubles.  There are random snips of ribbon, buttons, brads, bling, pins, clips in there.  Whenever a package only has one or two things left I toss it in.  Then when I am working on a page that just needs one little bit of something I can usually find it here.


This is the Tool Center.  All of my frequently used tools are here.  The caddy on the right is from Pottery Barn.  Making Memories also makes a similar styled version.  It holds my black and brown journaling pens, pencils, regular pens, colored pencils, gel pens, glue pens,  baby wipes, paper trimmer, an extra self healing mat, brayer and more.  It has 3 picture holders in front, too, perfect for a craft room.


The Making Memories desktop carousel holds so many goodies - scissors, adhesive guns, rulers, tweezers, sandpaper, edge distressers, stapler, glue and pop dots, Crop A Dile, Corner Chomper, craft knifes, bone folders, rub on tools, paper piecer's, files....you name it.  If it is small it probably can be found in here.  The drawers also hold, small little tools as well.  Michaels still carries these, and I have seen them on a few of the scrap deal web sites from time to time.


In this pencil box (Walgreen's for a $1 or $2) I keep all of my Cat's Eye chalk inks. I love these for distressing edges in different colors and this fits a lot of these little ink pads.  It works great for going to a crop too, because I can throw this in my tote bag, and my stamping and inking options are plentiful.


On one side of  each desk of I have 2 small drawers about 3-4 inches high and 5 large file size drawers.


On the main side where I work I have my lesser used adhesives in the top drawer.


I found this divider at Michaels and used it to fit all kinds of random supplies and additional types of adhesive, staplesm tape, glue sticks, extra trimmer cartridges, etc.


The other side of the desk with these drawers has office supplies in it.


The larger drawers are used for some of my kit storage.  I still would like to re-do the kit storage.  Which I will get into in a later post.


2 other drawers have file folders in them to sort alphabet stickers (that are not Thickers) and rub-on's and stickers and look similar to this.


I also have a drawer for regular files, that includes things like handouts from classes I have taken. Another for computer software and DVD's burned with pictures and videos.  A drawer that holds printer and photo paper and ink cartridges for my printer. Another that holds all sorts of cords and adapters for the cameras, printers, computers, scanners, IPod's etc.  


I also have an empty drawer, that I am in the process of deciding a use for too.  It used to house my Thicker collection, but I have recently changed the way those are stored.


Tomorrow I will start on the shelve storage. 

Monday, July 5, 2010

Scrapbook Studio - Around the Room - Part 2

Hello!  Welcome to Part 2 of this 10 Part Series on where I create and how I keep it organized.  Today I am going to take you around the room to get you acquainted with the space as it is today.

Entering the room the main work area is the main hub. This set up gives me the ability to scrap with 2 friends by just moving the sewing machine.  I recently moved the printer to the counter space to give me more space on the desk for tools and supplies I use all the time and to preserve maximum work space.  My main work area is on the right side of the desk, which maximizes my ability to see my different creative options, as well as reach behind me to the closet and paper storage.


The 2 main desks have wood tops over 2 bases with both sides extended to the window with an additional base with a half size table top.  This furniture design worked well when I decided to move the desks to the center of the room. I like the flexibility I have with this furniture.  I turned the end folding table into my permanent sewing station (not that I have started sewing regularly. I am still a bit intimidated, but eventually I will tackle that thing).

Pottery Barn has a line of desks called Bedford very similar to the ones I have, but I couldn't afford those.  After a lot of searching I found something very similar from my very favorite store, Target. They still carry the line it is called Coastline.  What I loved about both of these is that they are component pieces.  So I was able to select the pieces I needed to design the room the way I wanted.  

I have seen the Pottery Barn desks in person and I am satisfied the quality of the Target desk is just is good.  The only real difference (other than price) is that the handles were different and the Pottery Barn brand had label holders on the drawers.  All of the Target pieces came put together, so we just had to unpack them from the boxes, set them in place, place the tops over the bases and install the handles.

Someday I think I may look at changing the desks to a a counter hight configuration. I think I may like that  better for creating, but I am more than happy to continue working in the space as it is.

Next, a closer look at the shelving and counter space on the left side of the room.


By moving the workspace in the middle I freed up the wall which is about 15 feet long.  I was able to fit 3 of the IKEA Expedit shelves.  I wanted counter space, for my frequently used tools, so I chose the 2 by 4 cube configurations and then utilized the wall space for vertical storage.  

These shelving units are inexpensive, easy to assemble and a good size for various scrapbook and craft items.  There are several configurations possible and at least 4 finishes for most styles. They could be useful for many different scrapbook spaces, regardless of your room size.

Next, from the corner to the left of the door looking to the back of the room:


I do have a large window in this room, but the room is in the basement. I only get great natural light in the late morning hours.  I have incorporated overhead lighting in my ceiling fan as well as 2 floor lamps and an Ott Lite which can usually be found on sale at any of the big box craft stores.  I got mine several years ago during a 40% off sale.  That lamp is my lifesaver most hours of the day.

While I didn't get the desks from Pottery Barn I did splurge on a few desk/office pieces from the Bedford collection.  These were:

The 2 drawer paper organizer and paper tray (not available), both on top of the shelves holding paper (above picture).  On my desk I use the caddy with 2 long and 3 short vertical slots (seen in first picture).

I also bought a few other pieces from Pottery Barn that are not available any longer (at least not online), including the shelves to the right of the window, a wall mounted DVD holder (seen in the second picture above, over the counter space) and the wall mounted craft room organizer (below the white board to the left of the window).  I will talk about how I use these in later posts.

The closet and paper shelves are behind my main work area.  In this picture the door is to the right and window to the left.


Just giving you a peek in the closet here.  There are all kinds of storage ideas in there that I will share in a later post.

Next, looking back at the door.


One of the things I love about my room being in the basement, is that I don't always have to clean up mid project.  My kids are little and are not down in the basement unsupervised and rarely do visitors come down.  Also, the room is at the end of the hall, so even if someone were to come down we could shut the door and no one would know what kind of mess I have going on.

As I mentioned yesterday, I added an additional IKEA Expedit shelving unit in January. I am much happier with this configuration as it allows much better storage space options.  I upgraded my Cricut last year to the Expression, so I moved it to the desk to make it more accessible and usable.

Next,  looking back in the corner to the right of the doorway.  


My "thinking" chair has been with me for about 20 years now.  I bought it at what was then called STOR, it was IKEA before we had ever heard of IKEA.  The chair is black but it looked out of place in the room, so I found a pink chenille blanket to cover it and some pillows. My dog, Marti loves to come sleep in that chair while I am creating.

The 2nd sewing machine is my "Target bargain basement" machine.  I figured I would keep that for sewing on my layouts and use the better machine for fabric.  Although, I have been using the better machine for both, so I may part ways with this one.

Tomorrow I hope you will join me for Part 3 - The Desk and What is at My Fingertips (most used tools). We will start getting into the details of how I use my space.

Sunday, July 4, 2010

Scrapbook Studio - Evolution of a Scrapbook Studio - Part 1

Welcome to my 10-part series on how my scrap room has transformed into where it is today.  Over the next 10 days, I am hoping to share some ideas on organizing all that stuff we accumulate when we start crafting so that you use the things that you have. I'll also talk about things I would like to still improve.  I think my room will always be a work in process, and that's okay with me.


Coming up over the next 10 days:

Part 1 - Evolution of a Scrapbook Studio 
Part 2 - Around the Room - Where I am Now
Part 3 - The Desk and What is at My Fingertips (most used tools)
Part 4 - Using the IKEA Shelves Part 1 - Counterspace, and all those cubes
Part 5 - Using the IKEA Shelves Part 2 - Ribbons, and Buttons, and Flowers, Oh My!
Part 6 - Using the Wall Space to Store Tools and Supplies
Part 7 - The Closet - Storing Stamps, a Library of Memories Backbone Peek, Color Drawers, and Much More
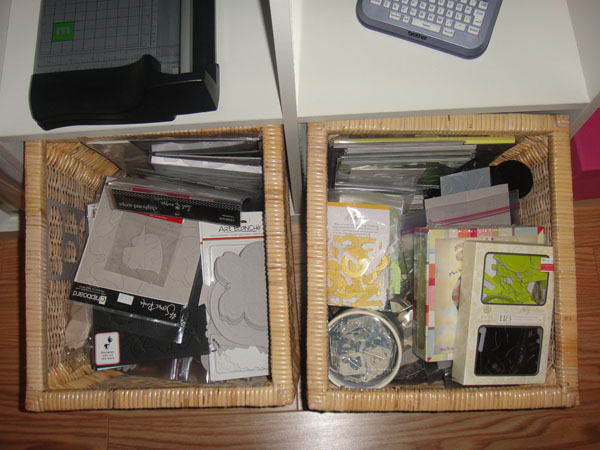
Part 8 - Cricut, Paper, Sewing and Kit Storage
Part 9 - My Library of Memories 
Part 10 - Purging - We've Got To Do It

Evolution of a Scrapbook Studio (Part 1):


To get an idea of where we are going, we should see where it all started.

I started scrapbooking in 2002.  We were pre-kids at the time and had a couple of empty bedrooms.  I took one of those spare bedrooms and set up a 6 foot folding table and started with a paper stack from Michaels and a few supplies that fit into a little 3 drawer organizer. Over the next 2 years I added a couple of bookcases and took over about 1/4 of a small closet.

We moved out of that house in 2004, shortly before we moved the room looked like this....


So in about 2 short years, I was well on my way to accumulating lots of stuff...


In 2004 we started building a new home.  When we saw the model for the home I knew immediately which room I wanted for my scrap space.


It doesn't look like much here, but for the room was in the basement and the basement bedrooms were huge. This one had a large walk in closet.

We lived in an apartment temporarily while the new house was being built, and while a lot of our stuff was in storage, I moved my scrap stuff with me.  I kept on scrapping and accumulating in that little office we shared in that little apartment.

And then I waited, and waited, and waited...until finally at the end of April 2005 our home was done and I had my future dream room.


I had several additional electrical outlets added around the room and a ceiling fan pre-wire to add additional lighting.  If I knew then what I know today, I would have had more overhead lighting installed.  I have had to add a lot of lighting around the room to get enough light.  The downside of the basement is there is only one window and it only gets good late morning ligh. The rest of the day the natural light isn't the best.

It took me a couple of months to get everything unpacked and set up in this room.  I was able to get these hand me down desks to have a computer desk and a scrap desk.

I had my "thinking" chair and lots of room.  I was very excited with the space...but the colors were uninspiring.  We also had just got puppies and I didn't trust them on the carpet at the time, but I wanted them down in the room with me while I was scrapping.


So after lots of planning and shopping for the best deals I could find, we transformed the room to this.

From the doorway


From the left of the window looking back


To the right of the window.

I didn't like having carpet in the room, it made me afraid to get messy.  So we ripped it out and put in laminate wood flooring.  I wanted happy bright colors and settled on this teal blue and accented the room with hot pink.

Since this major remodel I have updated the room every couple of years to where it is today.

In 2008 I decided I wanted my workspace in the middle of the room.  This made wall space available and I added the 3 IKEA Expedit shelves along the side wall and the Lisa and Becky wall system (that is no longer available).  This give me some counter space to work with for tools and machines. The little bookshelf that was in the corner was replaced in this update.  I also got rid of the white chairs, they were cute but not functional or comfortable and they didn't roll on the floor well.

From the doorway

From the opposite corner 

Looking back at the doorway.

Then came 2010.  As cute as those shelves were next the chair in the picture above they just weren't very useful. I was limited on how I could use the shelves to store things.  So I replaced them with another IKEA Expedit shelving unit.

From the doorway


From the opposite corner looking in

Looking back towards the door

Looking back towards the corner opposite the door

I have made some more tweaks since January after we closed down our business (Color Me Daisy). I had to incorporate some more things into the room as we cleaned out the rest of our inventory and tools. Tomorrow you'll see the room the way it is today and some highlights of things to come.

Saturday, July 3, 2010

Welcome!

Welcome to my Scrapbook Studio Blog.  Here I will share how I have set up my creative space and how I attempt to organize all my stuff.

Today

We have lived in our house since 2005 and my space has evolved over the years from mix and match leftovers, to my dream studio (always a work in process). On this blog I will share pictures of my space including how I have organized various scrapbook tools and supplies. I will also share tips and ideas I discover for organizing your creative space.